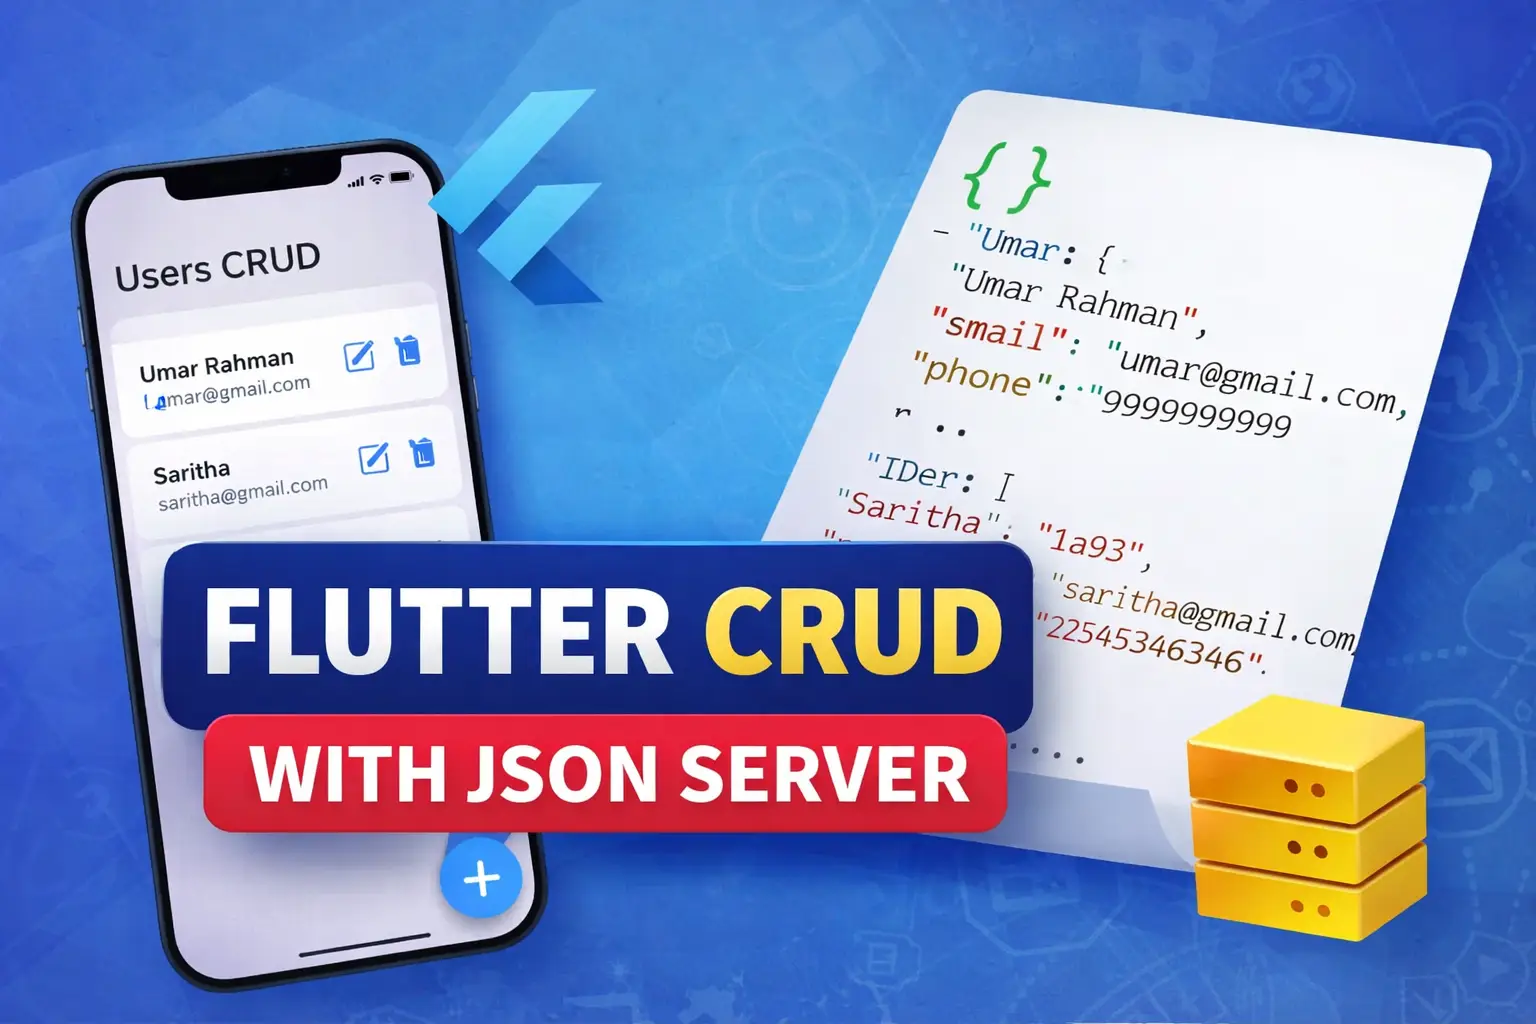
Flutter CRUD Application Using Fake JSON Server
In this blog, we will build a complete CRUD (Create, Read, Update, Delete)
application using Flutter and a Fake JSON Server. This approach is ideal for
learning API integration without setting up a real backend.
We will cover project setup, fake backend creation, model design, API services,
UI screens, and common real-world issues faced during development.
⭐ What is JSON Server?
JSON Server is a lightweight tool that allows you to create a fake REST API
using a simple JSON file. It supports GET, POST, PUT, PATCH, and DELETE requests
out of the box.
flutter_json_crud/
│
├── db.json
│
├── pubspec.yaml
│
└── lib/
    │
    ├── main.dart
    │
    ├── models/
    │   └── user_model.dart
    │
    ├── services/
    │   └── user_service.dart
    │
    └── screens/
        ├── user_list_screen.dart
        └── user_form_screen.dart
📌 Step 1: Create Fake Backend (db.json)
Create a file named db.json in your project directory and add
the following content:
{
  "users": [
    {
      "id": "1",
      "name": "Umar Rahman",
      "email": "umar@gmail.com",
      "phone": "9999999999"
    }
  ]
}
Start the JSON server using the command below:
npx json-server --watch db.json --port 3000 --corsTest the API in your browser:
http://localhost:3000/users📌 Step 2: Flutter Project Setup
Create a new Flutter project and add the HTTP package to
pubspec.yaml.
dependencies:
  flutter:
    sdk: flutter
  http: ^1.2.0
📌 Step 3: User Model
Create a model class to map API data. IDs are treated as strings because
JSON Server may generate alphanumeric IDs.
class User {
  final String? id;
  final String name;
  final String email;
  final String phone;

  User({
    this.id,
    required this.name,
    required this.email,
    required this.phone,
  });

  factory User.fromJson(Map<String, dynamic> json) {
    return User(
      id: json['id']?.toString(), // SAFE for string / UUID ids
      name: json['name'],
      email: json['email'],
      phone: json['phone'],
    );
  }

  Map<String, dynamic> toJson() {
    return {
      "name": name,
      "email": email,
      "phone": phone,
    };
  }
}
📌 Step 4: API Service (CRUD Operations)
The service class handles all communication with the fake backend.
import 'dart:convert';
import 'package:http/http.dart' as http;
import '../models/user_model.dart';

class UserService {
  static const String baseUrl = "http://localhost:3000/users";

  // READ
  static Future<List<User>> fetchUsers() async {
    final response = await http.get(Uri.parse(baseUrl));
    final List data = jsonDecode(response.body);
    return data.map((e) => User.fromJson(e)).toList();
  }

  // CREATE
  static Future<void> addUser(User user) async {
    await http.post(
      Uri.parse(baseUrl),
      headers: {"Content-Type": "application/json"},
      body: jsonEncode(user.toJson()),
    );
  }

  // UPDATE  (id as String – safe for UUID / alphanumeric ids)
  static Future<void> updateUser(String id, User user) async {
    await http.put(
      Uri.parse("$baseUrl/$id"),
      headers: {"Content-Type": "application/json"},
      body: jsonEncode(user.toJson()),
    );
  }

  // DELETE  (id as String)
  static Future<void> deleteUser(String id) async {
    await http.delete(Uri.parse("$baseUrl/$id"));
  }
}
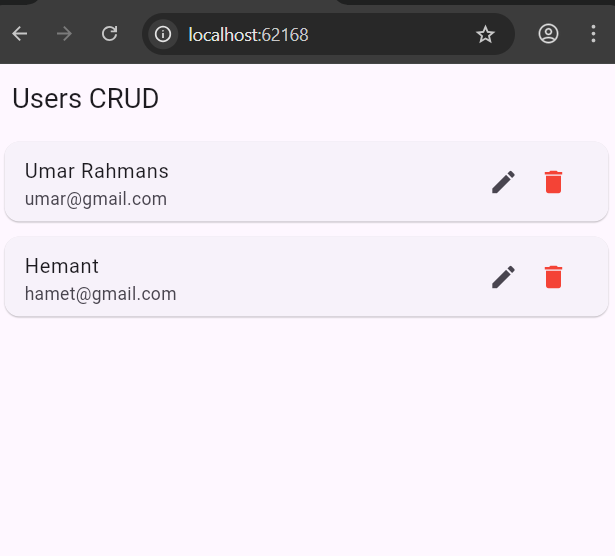
📌 Step 5: User List Screen (Read + Delete)
This screen displays users from the API and allows edit and delete actions.
import 'package:flutter/material.dart';
import '../models/user_model.dart';
import '../services/user_service.dart';
import 'user_form_screen.dart';

class UserListScreen extends StatefulWidget {
  const UserListScreen({super.key});

  @override
  State<UserListScreen> createState() => _UserListScreenState();
}

class _UserListScreenState extends State<UserListScreen> {
  late Future<List<User>> users;

  @override
  void initState() {
    super.initState();
    users = UserService.fetchUsers();
  }

  void refresh() {
    setState(() {
      users = UserService.fetchUsers();
    });
  }

  @override
  Widget build(BuildContext context) {
    return Scaffold(
      appBar: AppBar(title: const Text("Users CRUD")),
      floatingActionButton: FloatingActionButton(
        child: const Icon(Icons.add),
        onPressed: () async {
          final result = await Navigator.push(
            context,
            MaterialPageRoute(builder: (_) => const UserFormScreen()),
          );

          if (result == true) {
            refresh(); // refresh only on success
          }
        },
      ),
      body: FutureBuilder<List<User>>(
        future: users,
        builder: (context, snapshot) {
          // Loading
          if (snapshot.connectionState == ConnectionState.waiting) {
            return const Center(child: CircularProgressIndicator());
          }

          // Error
          if (snapshot.hasError) {
            return Center(
              child: Text(
                "Error: ${snapshot.error}",
                style: const TextStyle(color: Colors.red),
              ),
            );
          }

          // No data
          if (!snapshot.hasData || snapshot.data!.isEmpty) {
            return const Center(child: Text("No users found"));
          }

          final userList = snapshot.data!;

          return ListView.builder(
            itemCount: userList.length,
            itemBuilder: (context, index) {
              final user = userList[index];

              return Card(
                margin: const EdgeInsets.symmetric(horizontal: 10, vertical: 6),
                child: ListTile(
                  title: Text(user.name),
                  subtitle: Text(user.email),
                  trailing: Row(
                    mainAxisSize: MainAxisSize.min,
                    children: [
                      // EDIT
                      IconButton(
                        icon: const Icon(Icons.edit),
                        onPressed: () async {
                          final result = await Navigator.push(
                            context,
                            MaterialPageRoute(
                              builder: (_) => UserFormScreen(user: user),
                            ),
                          );

                          if (result == true) {
                            refresh();
                          }
                        },
                      ),

                      // DELETE
                      IconButton(
                        icon: const Icon(Icons.delete, color: Colors.red),
                        onPressed: () async {
                          await UserService.deleteUser(user.id!);
                          refresh();
                        },
                      ),
                    ],
                  ),
                ),
              );
            },
          );
        },
      ),
    );
  }
}
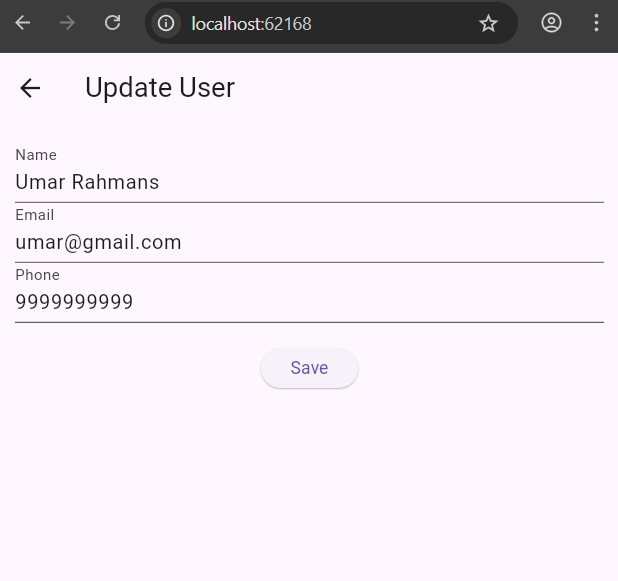
📌 Step 6: Add User Screen
import 'package:flutter/material.dart';
import '../models/user_model.dart';
import '../services/user_service.dart';

class UserFormScreen extends StatefulWidget {
  final User? user;
  const UserFormScreen({super.key, this.user});

  @override
  State<UserFormScreen> createState() => _UserFormScreenState();
}

class _UserFormScreenState extends State<UserFormScreen> {
  final _formKey = GlobalKey<FormState>();

  late TextEditingController name;
  late TextEditingController email;
  late TextEditingController phone;

  bool isLoading = false;

  @override
  void initState() {
    super.initState();
    name = TextEditingController(text: widget.user?.name ?? "");
    email = TextEditingController(text: widget.user?.email ?? "");
    phone = TextEditingController(text: widget.user?.phone ?? "");
  }

  @override
  void dispose() {
    name.dispose();
    email.dispose();
    phone.dispose();
    super.dispose();
  }

  Future<void> saveUser() async {
    if (!_formKey.currentState!.validate()) return;

    setState(() => isLoading = true);

    final user = User(
      name: name.text.trim(),
      email: email.text.trim(),
      phone: phone.text.trim(),
    );

    try {
      if (widget.user == null) {
        await UserService.addUser(user);
      } else {
        await UserService.updateUser(widget.user!.id!, user);
      }

      Navigator.pop(context, true); // return success
    } catch (e) {
      ScaffoldMessenger.of(context).showSnackBar(
        SnackBar(content: Text("Error: $e")),
      );
    } finally {
      if (mounted) {
        setState(() => isLoading = false);
      }
    }
  }

  @override
  Widget build(BuildContext context) {
    return Scaffold(
      appBar: AppBar(
        title: Text(widget.user == null ? "Add User" : "Update User"),
      ),
      body: Padding(
        padding: const EdgeInsets.all(16),
        child: Form(
          key: _formKey,
          child: Column(
            children: [
              TextFormField(
                controller: name,
                decoration: const InputDecoration(labelText: "Name"),
                validator: (v) =>
                    v == null || v.isEmpty ? "Name required" : null,
              ),
              TextFormField(
                controller: email,
                decoration: const InputDecoration(labelText: "Email"),
                validator: (v) =>
                    v == null || v.isEmpty ? "Email required" : null,
              ),
              TextFormField(
                controller: phone,
                decoration: const InputDecoration(labelText: "Phone"),
                validator: (v) =>
                    v == null || v.isEmpty ? "Phone required" : null,
              ),
              const SizedBox(height: 20),
              ElevatedButton(
                onPressed: isLoading ? null : saveUser,
                child: isLoading
                    ? const CircularProgressIndicator(color: Colors.white)
                    : const Text("Save"),
              ),
            ],
          ),
        ),
      ),
    );
  }
}
📌 Step 7: Main
import 'package:flutter/material.dart';
import 'screens/user_list_screen.dart';

void main() {
  runApp(const MyApp());
}

class MyApp extends StatelessWidget {
  const MyApp({super.key});

  @override
  Widget build(BuildContext context) {
    return MaterialApp(
      debugShowCheckedModeBanner: false,
      home: UserListScreen(),
    );
  }
}
📌 Step 8: Output
⭐ Common Issues and Fixes
- ID format mismatch (always treat ID as String)
- Infinite loader due to missing FutureBuilder states
- List not refreshing after navigation
- Missing CORS in Flutter Web
📌 Final Output
- Fake REST API using JSON Server
- Flutter CRUD operations
- Clean architecture (Model, Service, UI)
- Web and mobile compatible
📌 Summary
This blog demonstrated how to build a complete Flutter CRUD application using a
Fake JSON Server. This setup is perfect for beginners and mirrors real-world API
integration patterns used in production applications.


