Laravel

How to Build a Laravel 11 REST API for Product Management

Laravel is a robust PHP framework known for its simplicity and developer-friendly approach. In this tutorial, we’ll guide you through creating a REST API for managing products in Laravel 11. This step-by-step process includes setting up models, controllers, migrations, and routes to handle CRUD (Create, Read, Update, Delete) operations. Whether you’re building a small project or a scalable application, understanding RESTful APIs is essential for modern web development.

Introduction
The REST API we create will allow users to:

  • Retrieve products: Fetch all or specific product details.
  • Create products: Add new product entries with name, description, and price.
  • Update products: Edit existing product details.
  • Delete products: Remove product records.


Using Laravel’s php artisan commands, you’ll easily generate models, controllers, and migrations to power your API. By the end, you’ll have endpoints ready for real-world use and testing with tools like Postman.

Step 1: Install Laravel

First, create a new Laravel project using Composer.

composer create-project laravel/laravel laravel-rest-api

Navigate to the project directory:

cd laravel-rest-api

Step 2: Configure the Database

Update the .env file with your database connection details:

DB_CONNECTION=mysql
DB_HOST=127.0.0.1
DB_PORT=3306
DB_DATABASE=laravel_api
DB_USERNAME=root
DB_PASSWORD=

Step 3: Create the Product Model and Migration

Generate a model with a migration file:

php artisan make:model Product -m

Edit the migration file in database/migrations/YYYY_MM_DD_create_products_table.php:

use Illuminate\Database\Migrations\Migration;
use Illuminate\Database\Schema\Blueprint;
use Illuminate\Support\Facades\Schema;

return new class extends Migration
{
    public function up()
    {
        Schema::create('products', function (Blueprint $table) {
            $table->id();
            $table->string('name');
            $table->text('description');
            $table->decimal('price', 10, 2);
            $table->timestamps();
        });
    }

    public function down()
    {
        Schema::dropIfExists('products');
    }
};

Run the migration to create the products table:

php artisan migrate

Step 4: Create the ProductController

Generate a controller:

php artisan make:controller ProductController --resource


Add the following code to app/Http/Controllers/ProductController.php:

<?php

namespace App\Http\Controllers;

use App\Models\Product;
use Illuminate\Http\Request;

class ProductController extends Controller
{
    // Get all products
    public function index()
    {
        return response()->json(Product::all(), 200);
    }

    // Store a new product
    public function store(Request $request)
    {
        $validatedData = $request->validate([
            'name' => 'required|string|max:255',
            'description' => 'required|string',
            'price' => 'required|numeric|min:0',
        ]);

        $product = Product::create($validatedData);
        return response()->json($product, 201);
    }

    // Get a specific product
    public function show($id)
    {
        $product = Product::find($id);

        if (!$product) {
            return response()->json(['message' => 'Product not found'], 404);
        }

        return response()->json($product, 200);
    }

    // Update a product
    public function update(Request $request, $id)
    {
        $product = Product::find($id);

        if (!$product) {
            return response()->json(['message' => 'Product not found'], 404);
        }

        $validatedData = $request->validate([
            'name' => 'sometimes|required|string|max:255',
            'description' => 'sometimes|required|string',
            'price' => 'sometimes|required|numeric|min:0',
        ]);

        $product->update($validatedData);
        return response()->json($product, 200);
    }

    // Delete a product
    public function destroy($id)
    {
        $product = Product::find($id);

        if (!$product) {
            return response()->json(['message' => 'Product not found'], 404);
        }

        $product->delete();
        return response()->json(['message' => 'Product deleted successfully'], 200);
    }
}


Step 5: Add API Routes

Open the routes/api.php file and add the following:

use App\Http\Controllers\ProductController;

Route::apiResource('products', ProductController::class);

Step 6: Enable Mass Assignment in the Model

Edit the Product model (app/Models/Product.php) to allow mass assignment:

<?php

namespace App\Models;

use Illuminate\Database\Eloquent\Factories\HasFactory;
use Illuminate\Database\Eloquent\Model;

class Product extends Model
{
    use HasFactory;

    protected $fillable = [
        'name',
        'description',
        'price',
    ];
}


Step 7: Test the API

Use tools like Postman or cURL to test the API endpoints:
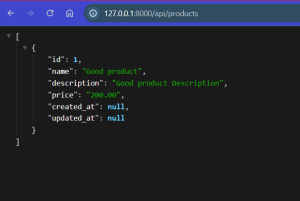
  1. Get all products:
    • Method: GET
    • URL: /api/products

  1. Create a new product:
    • Method: POST
    • URL: /api/products
    • Body (JSON):

      {
        "name": "Laptop",
        "description": "A high-performance laptop",
        "price": 1500.00
      }
      

  2. Get a specific product:
    • Method: GET
    • URL: /api/products/{id}
  3. Update a product:
    • Method: PUT
    • URL: /api/products/{id}
    • Body (JSON):
      {
        "name": "Gaming Laptop",
        "price": 1800.00
      }
      
  4. Delete a product:
    • Method: DELETE
    • URL: /api/products/{id}

Summary
In this guide, we demonstrated how to create a REST API in Laravel 11 for product management. This included CRUD operations, HTTP methods, and testing APIs. Mastering this ensures seamless integration between your Laravel backend and frontend applications, enhancing user experiences and productivity. Start building now!

Leave a Reply

Your email address will not be published. Required fields are marked *